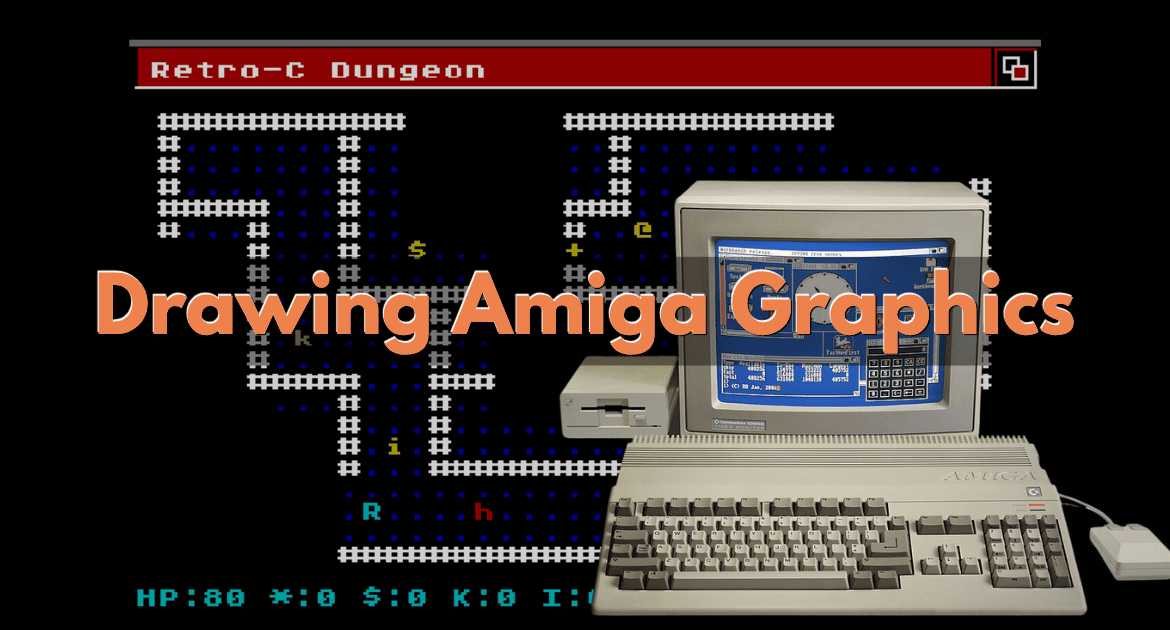
The Amiga is not well suited to terminal interfaces, it turns out. Sure, it can do TUI (terminal user interfaces), but it’s not fantastic at it using C at least.
But is that surprising, given that it was designed to be a graphics and sound powerhouse, not a Unix workstation?
In part 5 we wrote v1 of the Amiga adapter. ANSI escapes through printf to the AmigaOS shell. It worked, technically, with three large compromises:
- Monochrome. AROS Shell’s CSI maps
\033[30..37mto console pens, not literal colour names, and\033[40mbackground changes aren’t honoured at all. v1 ran on the shell’s default pen against its default grey. - Slow. AROS Shell parses every byte of every CSI sequence. Per-glyph cursor moves and colour resets queued up faster than the shell could repaint.
- Burst input. Even after
SetMode(Input(), DOSTRUE)for raw keys, the player’s keystrokes piled up in the line-edit buffer during slow draws and replayed in bursts.
Mission today is to stop fighting shell hell and use the Amiga hardware as it was intended!
Play the colour version in your browser
v2 of the Amiga adapter opens its own Intuition screen, paints with graphics.library, and reads keys via IDCMP. Same C source as the other targets, very different feel:
The Mission
platform.h declares fifteen functions but nothing determines implementation, only interface. The C64 adapter uses cc65’s conio.h. The BBC adapter too. The Atari ST adapter uses VT52 escapes through TOS BIOS calls. The Amiga adapter can use whatever it wants, including opening its own Intuition screen and painting directly with graphics.library.
Wait, what the heck is “Intuition”?
What an “Intuition screen” is
Newcomers to AmigaOS often see “screen” and “window” used together and assume they’re the same thing but they are different:
- A screen is a full piece of display hardware setup: a width, a height, a colour depth (in bitplanes), and a viewport. The Amiga can have several screens open at once. Workbench is one screen. A game like Lemmings opens its own screen in low-res 320×256 with its own palette. You drag screens up and down with the title bar handles to switch between them.
- A window is a rectangular drawing region inside a screen. A screen can host many windows. The shell you start the program from is a window on the Workbench screen.
For a game we open a custom screen, then a single full-size borderless backdrop window over it. The screen lets us control depth and palette without negotiating with Workbench. The window gives us a RastPort (the graphics-library drawing context) and an IDCMP port for keyboard events.
What a RastPort is
RastPort is graphics.library‘s drawing state. It holds:
- A pointer to the
BitMapwe’re drawing into (the screen’s bitplanes). - A current cursor position (
cp_x,cp_y). - A current foreground pen (
APen), background pen (BPen), and outline pen (OPen). - A current drawing mode (
JAM1= foreground only,JAM2= foreground and background, etc). - A pointer to the current font.
Almost every graphics.library call takes a RastPort * as its first argument and mutates one of these fields. SetAPen(rp, 6) changes the foreground pen to 6. Move(rp, x, y) moves the cursor. Text(rp, str, n) paints n characters from str starting at the cursor.
In our adapter rp is just win->RPort, the RastPort the system created when it opened our backdrop window.
What a “pen” is
A pen is an index into the screen’s palette, kind of like in 8-bit machines where you can say color 2. The default Amiga palette has eight slots in a 3-bitplane screen (more if you ask for more bitplanes). Drawing in pen 1 puts colour palette[1] on screen. Drawing in pen 4 puts palette[4]. You change the palette with SetRGB4 (or LoadRGB4 for a whole batch). You change which pen is “current” with SetAPen. The two are independent: pens are a permanent property of the screen; APen is just a current-state field on the RastPort.
We use eight pens, one per COL_* value in platform.h:
static const UWORD palette[8] = {
    0x000, /* 0 COL_BLACK   */
    0xFFF, /* 1 COL_WHITE   */
    0xF00, /* 2 COL_RED     */
    0x0F0, /* 3 COL_GREEN   */
    0x00F, /* 4 COL_BLUE    */
    0xFE0, /* 5 COL_YELLOW  */
    0x0FF, /* 6 COL_CYAN    */
    0xF0F  /* 7 COL_MAGENTA */
};
Each entry is a 12-bit RGB value, four bits per channel. 0xFE0 is bright yellow with a hint of green. Standard Amiga palette format.
“But the advertising said 32 colours out of 4096”
Yeah, every Amiga 1000 / 500 story had the claim “32 colours out of a palette of 4096“, and yet we’re only using 8 of them. What gives?
The two numbers describe different things:
- 4096 is the size of the total colour space the hardware can choose from. Each palette slot is a 12-bit
0RGBvalue: 4 bits red × 4 bits green × 4 bits blue = 16 × 16 × 16 = 4096 distinct colours you can choose from. Every palette entry on every screen, is chosen from that pool. - 32 is the maximum number of colours you can show at once in a standard OCS low-res screen. That number is governed by bitplanes. The screen depth you pick at
OpenScreentime decides how many bitplanes you get, and bitplanes give you 2^depth simultaneous pens.
The depth-to-pens table for plain OCS low-res:
SA_Depth |
Bitplanes | Pens on screen | Chip RAM cost per 320×256 |
|---|---|---|---|
| 1 | 1 | 2 | ~10 KB |
| 2 | 2 | 4 | ~20 KB |
| 3 | 3 | 8 | ~30 KB |
| 4 | 4 | 16 | ~40 KB |
| 5 | 5 | 32 | ~50 KB |
So 32 colours is the top of “plain bitplane” mode in low-res. We asked for SA_Depth, 3, which gives us 8 pens. For a text-mode dungeon with one colour per tile category, eight is plenty. Going to depth 5 would cost more chip RAM, slow down every bitplane operation (each Move / Text / blit has to involve one more plane), and we’d be picking palette entries we’d never use.
Outside plain bitplane mode the Amiga has two famous extras:
- Extra Half-Brite (EHB): a sixth bitplane that halves the brightness of pens 0..31 to make pens 32..63. 64 colours on screen, still chosen from the 4096-total.
- HAM (Hold-and-Modify): a special mode where each pixel either picks a palette entry or replaces just one channel (R, G, or B) of the previous pixel. Effectively 4096 simultaneous colours, with some small-print constraints. This is the mode behind those impressive “12-bit Amiga picture” demos on Aminet.
Both are out of the question for a silly little roguelike. If you do want to play with them, change the depth or add HAM_KEY to the SA_DisplayID value and adjust the palette. The adapter we built won’t need to change.
“Why can’t I just POKE the screen like on a C64?”
If you’ve come from 8-bit BASIC or 8-bit C, your next question is probably to ask why we’re bothering with all this Intuition / RastPort / pen machinery when on the C64 you can POKE 1024, 1 and an A appears in the top-left corner.
True, the Amiga can also write to its screen memory directly. It just doesn’t look anything like what you’re used to. Things change a lot when you move from a 6502-class 8-bit to the Amiga.
Amiga screen memory isn’t at a fixed address
On the C64 the screen starts out at $0400. On the PET it lives at $8000. On the BBC it depends on the MODE you selected, but the addresses are documented and stable. You learn them then work around them.
On the Amiga the screen is a BitMap that AmigaOS allocates from chip RAM when you call OpenScreen. The address could be almost anywhere. The game just loaded may have its own screen at a different address. Workbench has yet another. Hard-coded addresses don’t survive a reboot.
You can check the BitMap pointer (scr->RastPort.BitMap->Planes[N] which gives you the base of bitplane N), and demoscene code often does that for raw speed. But the address has to be read from a structure, not a fixed location.
One byte isn’t one character cell
On the C64, screen memory is a 1000-byte rectangle (25 rows of 40 columns). One byte = one screen-code = one cell. Set the byte correctly and you see the character. Optionally add colour RAM as a separate 1000-byte parallel array if you want per-cell colour.
The Amiga has no concept of character cells in hardware. It has bitplanes: parallel 1-bit-deep bitmaps that combine to form the final pixel colour. A 3-bitplane screen at 320×256 needs three 320×256-bit (10240-byte) planes, drawn over each other. The hardware adds the bits at each pixel position to look up a palette index: bit-from-plane-0 × 1 + bit-from-plane-1 × 2 + bit-from-plane-2 × 4 = a number 0..7 that picks the pen.
To draw an A you need to take eight bytes of font data, find the right pixel-row in each bitplane, and OR or AND the font bits into them. Across three bitplanes, with the colour broken across planes, eight scanlines per glyph, for every glyph on every redraw. That isn’t difficult code to write, but it’s a noticeable jump in mental load compared to a single POKE, plus graphics.library was built to do it for us instead.
When we call Text(rp, &c, 1), the library does the bitplane stuff for us, using our current pen, current drawing mode, and current font. We get to deal with “a character at a position”, same as on the C64, but it’s the library that does the bitplane maths.
The Amiga multitasks
On a C64 your program can pretty much own the whole machine. There’s nothing else running but your code. Rapidly pushing data at $0400 is fine, it’s yours to hammer.
The Amiga, though, runs Workbench, which is still paying attention to the shell that launched your program, and another tool could in theory pop up a screen in front of yours at any time. If you skip the OS, you could:
- Draw on top of some other program’s window.
- Corrupt the display.
- Get your bytes overwritten.
OpenScreen gives you a screen that’s yours. Move and Text write through the RastPort, and Intuition controls that region for you. Pull-down screens, screen switches, refreshes all keep working with no (fewer?) nasty surprises.
What did retro Amiga games do?
There were many approaches back in the day, and I am by no means an expert:
- Use graphics.library (what we do): readable code, plays nicely with the OS, fast enough for a turn-based game. Recommended starting point.
- Use graphics.library for setup, then walk bitplanes for the inner loop: open the screen and font with the OS, but the per-frame fill or scroll touches bitplane memory directly. Common in 90s commercial games like Shadow of the Beast, where the OS owns the screen and the game drives the 50 Hz redraw.
- Take over the hardware (
LoadView(NULL), nerf the OS): the demo-scene path. Maximum speed, no OS at all. Not appropriate here because we want to coexist with the shell that launched us, and because we want the dungeon to run on AROS, Workbench-friendly Kickstart, and your modern emulator without rewriting the bottom half.
In a later post we’ll explore more, but for now the first option is the best next step.
Opening our screen and window
So we finally get to the point of today’s post, opening up the screen and window so we can draw stuff:
SA_Depth, 3= 3 bitplanes = 8 colours. Enough for a dungeon. More bitplanes cost more chip RAM and slower bitplane writes.SA_DisplayID, PAL_MONITOR_ID | LORES_KEY. Without this, AROS defaulted to NTSC (320×200).WA_Backdrop, TRUEandWA_Borderless, TRUEtogether give us a window that fills the screen with no border and no close gadget.WA_NoCareRefresh, TRUEopts out of refresh events. We redraw on game state changes anyway, so we don’t need the OS to tell us when to repaint.WA_IDCMP, IDCMP_RAWKEYasks Intuition to forward raw key scan codes to our window’s UserPort. We want the physical key the user hit.LoadRGB4uploads the whole palette in one call.ScreenToFrontandActivateWindoware belt-and-braces. AROS would sometimes swallow our player’s first keystrokes.
scr = OpenScreenTags(NULL,
    SA_Width,     320,
    SA_Height,    256,
    SA_Depth,     3,
    SA_Type,      CUSTOMSCREEN,
    SA_DisplayID, PAL_MONITOR_ID | LORES_KEY,
    SA_Title,     (ULONG)"Retro-C Dungeon",
    TAG_END);

win = OpenWindowTags(NULL,
    WA_Width,         320,
    WA_Height,        256,
    WA_CustomScreen,  (ULONG)scr,
    WA_Backdrop,      TRUE,
    WA_Borderless,    TRUE,
    WA_NoCareRefresh, TRUE,
    WA_Activate,      TRUE,
    WA_IDCMP,         IDCMP_RAWKEY,
    TAG_END);
rp = win->RPort;

LoadRGB4(&scr->ViewPort, palette, 8);
ScreenToFront(scr);
ActivateWindow(win);
Drawing on the window
The main action is in plat_putc:
void plat_putc(uint8_t x, uint8_t y, glyph_t g, uint8_t colour) {
    char c = (char)glyph_native[g];
    SetAPen(rp, (UBYTE)(colour & 7));
    if (!(y == (uint8_t)last_y && (uint8_t)(last_x + 1) == x)) {
        Move(rp, (LONG)(x * 8), (LONG)(y_pixel_offset + y * 8 + 6));
    }
    Text(rp, &c, 1);
    last_x = (int16_t)x;
    last_y = (int16_t)y;
}
The grid is character-based: row Y, column X. Each cell is 8 pixels wide (topaz/8 font) and 8 pixels tall. So:
x * 8converts column to pixel column.y * 8 + 6converts row to pixel row at the baseline of topaz/8 (6 pixels down from the top of an 8-pixel cell). Baseline is whereTextplants the bottom of letters like “a”; the ascenders rise above and descenders drop below.y_pixel_offset(scr->BarHeight + 1) shifts everything down past the screen’s title bar so row 0 of the grid sits cleanly below it.
The if (!(y == last_y && last_x + 1 == x)) line is a small optimisation. Text advances the RastPort’s internal cursor cp_x by the width of what it drew. If the next call is the very next column on the same row, we don’t need to Move again. A row of 40 cells goes from 40 Move calls plus 40 Text calls to 1 Move plus 40 Text calls. Move has measurable cost on a 7 MHz 68000.
Amiga keyboard input and reading key presses
Intuition delivers raw keyboard scan codes through the window’s UserPort as IntuiMessage objects.
static int peek_rawkey(UWORD *out) {
    struct IntuiMessage *msg;
    UWORD code;
    while ((msg = (struct IntuiMessage *)GetMsg(win->UserPort)) != NULL) {
        code = msg->Code;
        ReplyMsg((struct Message *)msg);
        if (msg->Class != IDCMP_RAWKEY) continue;
        if (code & 0x80) continue;     /* key release: ignore */
        *out = code;
        return 0;
    }
    return -1;
}

static UWORD wait_rawkey(void) {
    UWORD code;
    for (;;) {
        WaitPort(win->UserPort);
        if (peek_rawkey(&code) == 0) return code;
    }
}
- A key press arrives with
code & 0x80 == 0. A key release has the high bit set. We ignore releases here. ReplyMsgis mandatory: Intuition allocates the message and we must return it. Forget this and the system leaks IntuiMessages.
Translating scan code to logical key is just a ‘case’ of:
static uint8_t map_rawkey(UWORD code) {
    switch (code) {
        case 0x4C: return K_UP;     /* cursor up    */
        case 0x4D: return K_DOWN;   /* cursor down  */
        case 0x4F: return K_LEFT;   /* cursor left  */
        case 0x4E: return K_RIGHT;  /* cursor right */
        case 0x11: return K_UP;     /* W */
        case 0x21: return K_DOWN;   /* S */
        case 0x20: return K_LEFT;   /* A */
        case 0x22: return K_RIGHT;  /* D */
        case 0x31: return K_FIRE;   /* Z */
        case 0x40: return K_FIRE;   /* space */
        case 0x44: return K_FIRE;   /* return */
        case 0x10: return K_QUIT;   /* Q */
        case 0x45: return K_QUIT;   /* ESC */
        default:   return K_OTHER;
    }
}
WASD plus arrows plus the usual fire and quit keys. Other adapters do the same with different scan codes (cc65 PETSCII for the C64, VT52 on the Atari ST).
Assumptions and bug squashing
Real retro development is iterative. My dungeon didn’t look right on the first run, the second run, or the third. Each failure taught me something useful, though.
Bug 1: NTSC clip
First was 320×200 (NTSC default) instead of 320×256 (PAL). The dungeon fit, the status line didn’t.
Fix: SA_DisplayID, PAL_MONITOR_ID | LORES_KEY to pin the mode.
Don’t assume AmigaOS will guess your monitor type.
Bug 2: BarHeight guess
The screen’s title bar took more pixels than expected.
Fix: read scr->BarHeight at runtime, add 1 for the divider, use that as the y_pixel_offset from then on.
The OS can tell you a lot that you need to know, don’t hard-code assumed values.
Bug 3: strlen returned 0
After everything else worked, the attract screen still showed black-on-black. The dungeon glyphs (drawn one by one through plat_putc) appeared fine, but plat_puts for the title and instructions wrote nothing.
Turns out the strlen call inside plat_puts was failing. Commenting out len = strlen(s); if (len == 0) return; made the function emit garbage past the end of the string, this meant strlen was returning 0 for a real string literal. The function was bailing out before the loop ran!
The exact root cause is still a mystery, but it looks to me like a quirk on this particular vbcc/AROS combo. Who knows. The fix that worked is kind of a kludge:
while ((ch = s[i]) != '\0') {
    Move(rp, (LONG)((x + i) * 8), py);
    Text(rp, &ch, 1);
    i++;
}
Guess the lesson here is to comment our parts and see how the results change. The error might not even be yours.
Where we are now
| Compiles | ✓ |
| Dungeon renders | ✓ |
| Drawing speed | ✓ |
| Input | ✓ |
| Non-blocking | ✓ |
| Colour | ✓ |
| Title bar | ✓ |
| Display mode | ✓ |
| Sound | ✗ |
This is the build linked in the callout above. Same game/*.c as every other target; only platform/plat_amiga.c differs.
What comes next
A couple of natural follow-on posts would be Amiga and ST sound and sprites. Make sure you are subscribed to the newsletter so you don’t miss them!
Original article by retrogamecoders.com