June 10, 2026#136 Hardware
A Workstation Shelf
Ten years ago, later this year, I started this blog. And one of the first posts I wrote
was about the creation of Workstation Stands. Those
stands served me very well for a decade. But it was finally time to retire them in favor
of a new approach to creating a great workspace.
When I was getting back into the Commodore 64, I had a couple of fold-out tables with
white plastic top and metal legs. I started to spread my computers, monitors, drives, cables
and note-taking materials all over their surfaces. It quickly became a total mess.
One of the things about the wedge computer design is that the cables come out the
back and sides of the keyboard. Well, those cables have to go somewhere, but you’ve also got
to put your monitor somewhere, and then you’ve often got a disk drive or two beside the monitor,
and they’ve got cables that have to go somewhere. And suddenly, everything on a flat table
is total chaos.
Wedge computers don’t have to be complete chaos, but you do need some planning and you
absolutely need some kind of monitor stand. The concept is simple; the monitor stand lifts
the monitor up off the desk leaving a space beneath it through which the cables can easily
pass. A monitor stand solves all the problems. It looks neat, nothing is in the way, and the
monitor is often better positioned to look at when it’s elevated a bit.
The original design: cool but not perfect.
Here is the original design. I saw a picture of one that looked similar which gave me the
idea for mine. I liked the angled top, and it was a perfect fit to make one stand out of a
single sheet of “hobby board”. Hobby board is basically unfinished pine (or spruce, or fir.)
Easy to cut, easy to put screws through. And then you can finish it with paint or lacquer.
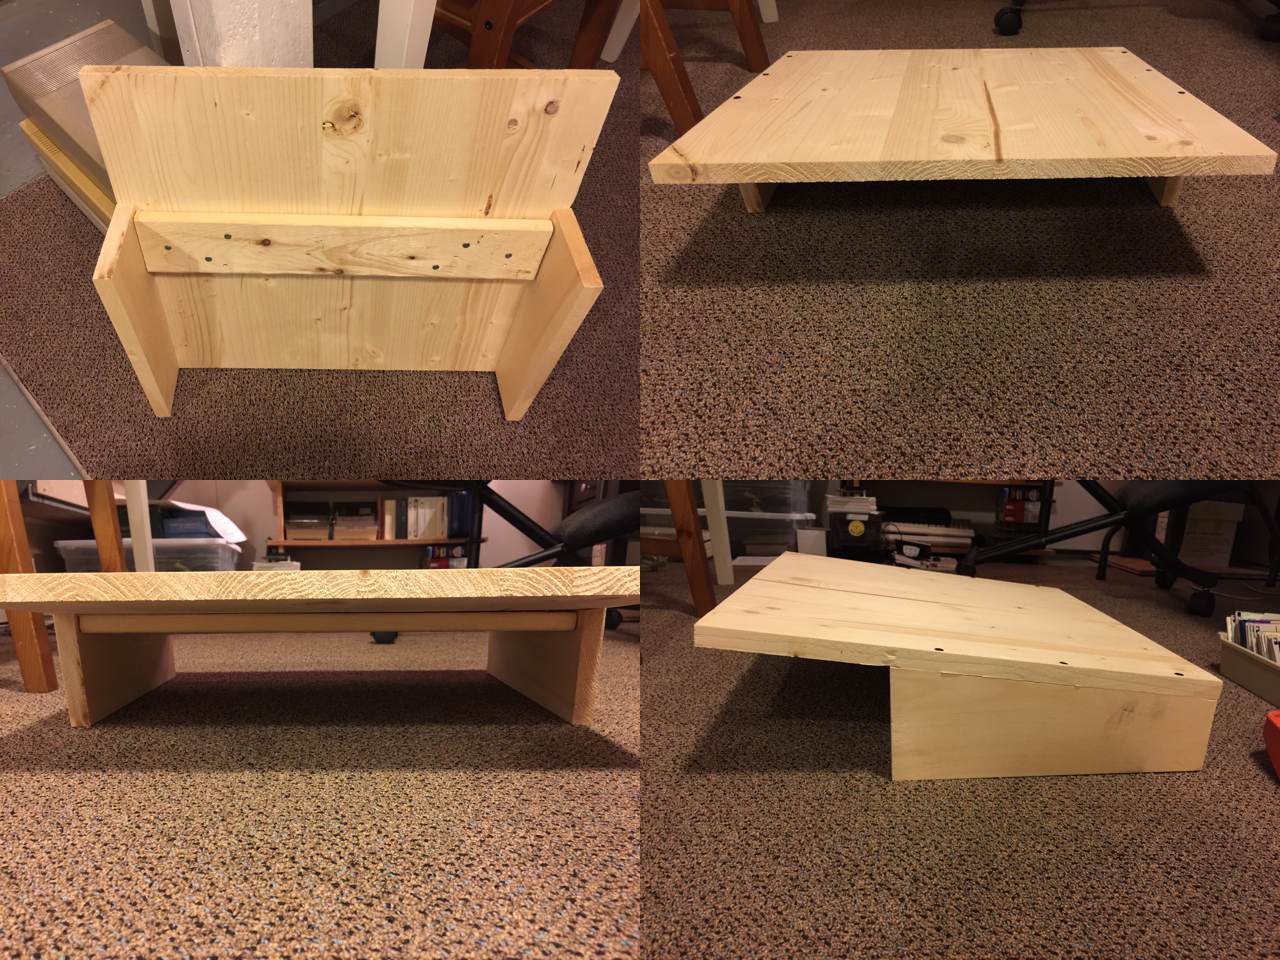
Unfortunately, the problems began almost right away. Problems that I’ve put up with for ten
years, because these stands were much better than no stands.
The first problem is that pine is soft and monitors are heavy. Immediately I found that there
was too much weight in the middle between the two legs only on the sides. I had to add a
supporting cross piece. The cross piece was just made from scrap I had lying around,
and I’m not sure what it’s made of, but it was significantly more rigid than the hobby board.
This was not the end of the problems though. Next, the two sides, the “feet” for lack of a
better way to describe them, are long, flat, and perfectly symmetrical. Ideally, if you measure
well and cut well they will be perfectly symmetrical, and they look great when they’re sitting
on that flat concrete floor (above.) The issue is that those white fold-out plastic-top tables
are not flat. From the moment I put these stands on the plastic table top, they didn’t sit
flat, and that has always driven me nuts. At first I shimmed them with folded paper and
old business cards. But that always looked gross. Like stuffing folded napkins under one foot
of an uneven table leg at an old Tim Hortons. Eventually I got wooden shims, but it’s always
bugged me that they were necessary.
The third problem was the real killer, the one that got me looking for a better solution.
Tall cartridges don’t fit under these stands. For example, a SuperCPU is taller than it is
deep and has switches coming out the top. These fit under the front part of the stand, but
the stand slopes towards the back. Pushing the computer back and under the stand to stow it
for the night becomes impossible. The cross piece that was added for structural support made
this problem worse. I recently got a RAMLink. It has a vertical cartridge port. Put in a
cartridge, boom, it’s too tall to slide under the stand. Or an EX3+1 cartridge port expander?
Its three cartridge ports are vertical. Put an REU or an IDE64 into one of those slots and
it’s instantly too tall.
Final problem, and I only noticed this when I started to disassemble the workspace and realized
I was sitting on a potential disaster. That hobby board didn’t age well under constant weight.
Even with the cross piece, cracks running straight through the top sheet had developed and
were hidden away under the monitor. I feel like this could have given way eventually and
who knows what that would have done to my monitor or the equipment underneath it.
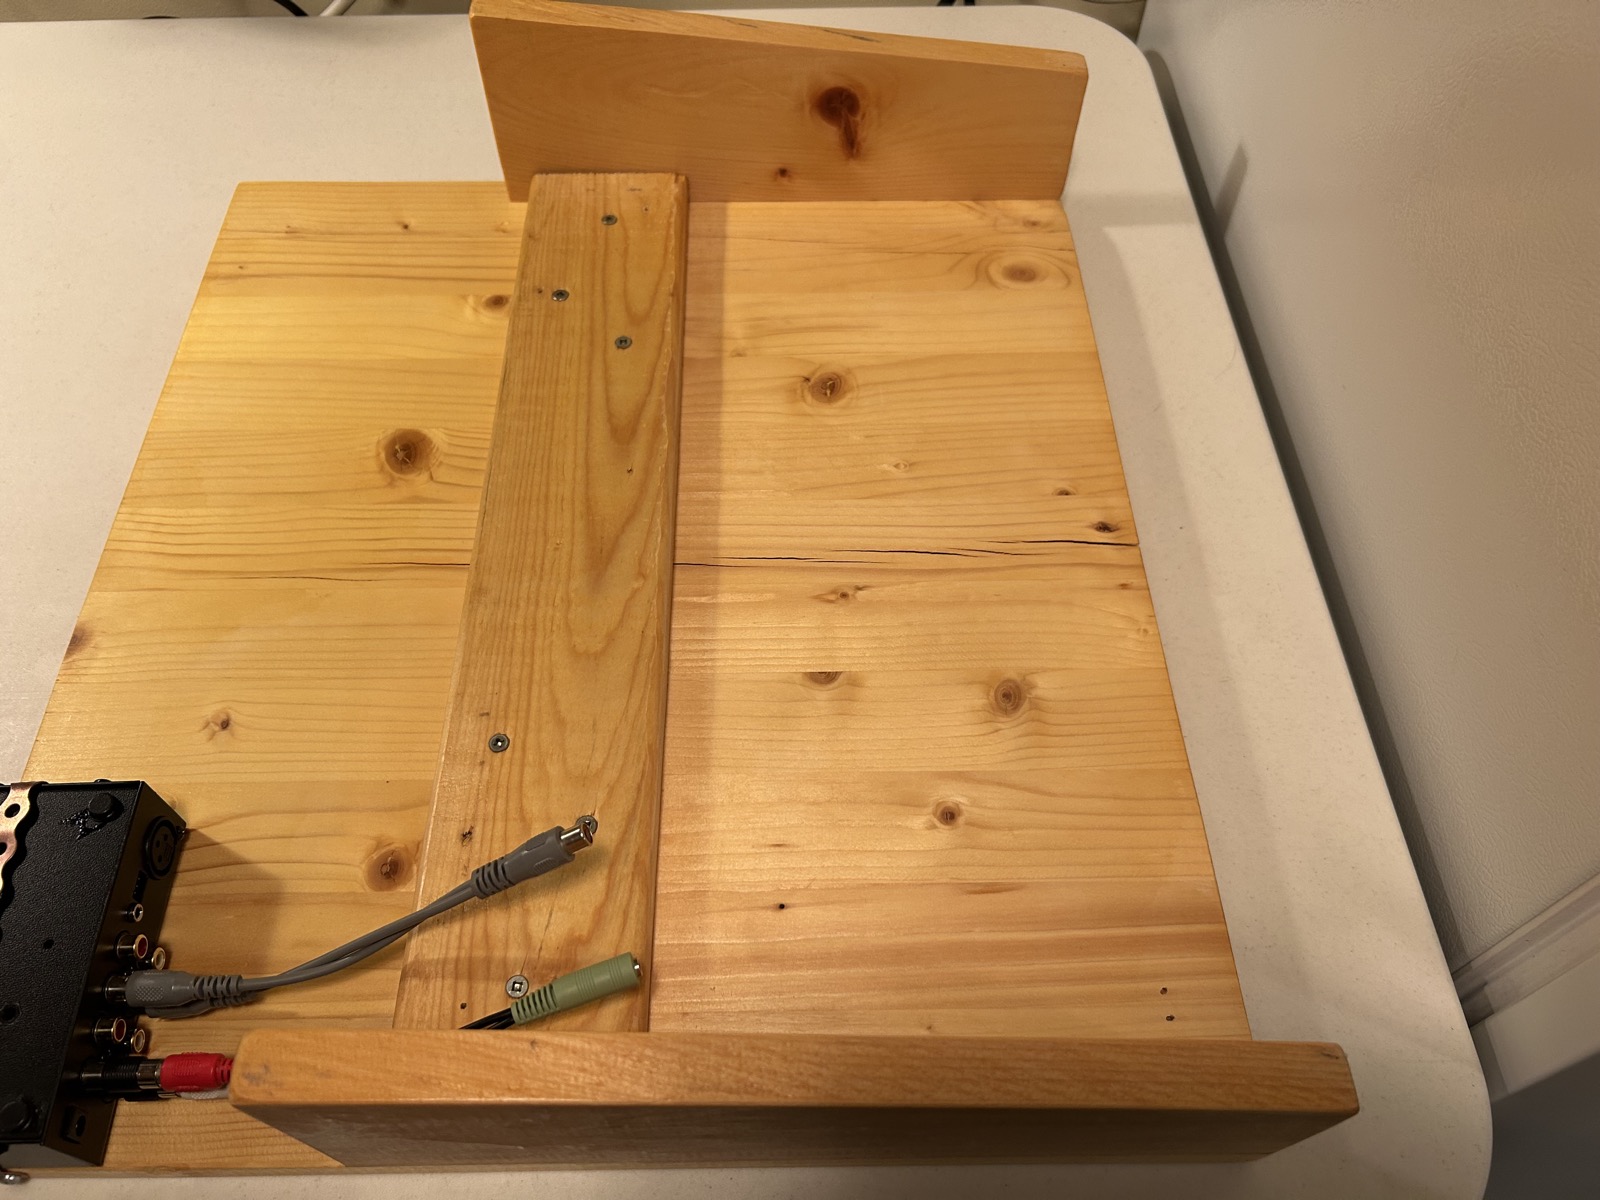
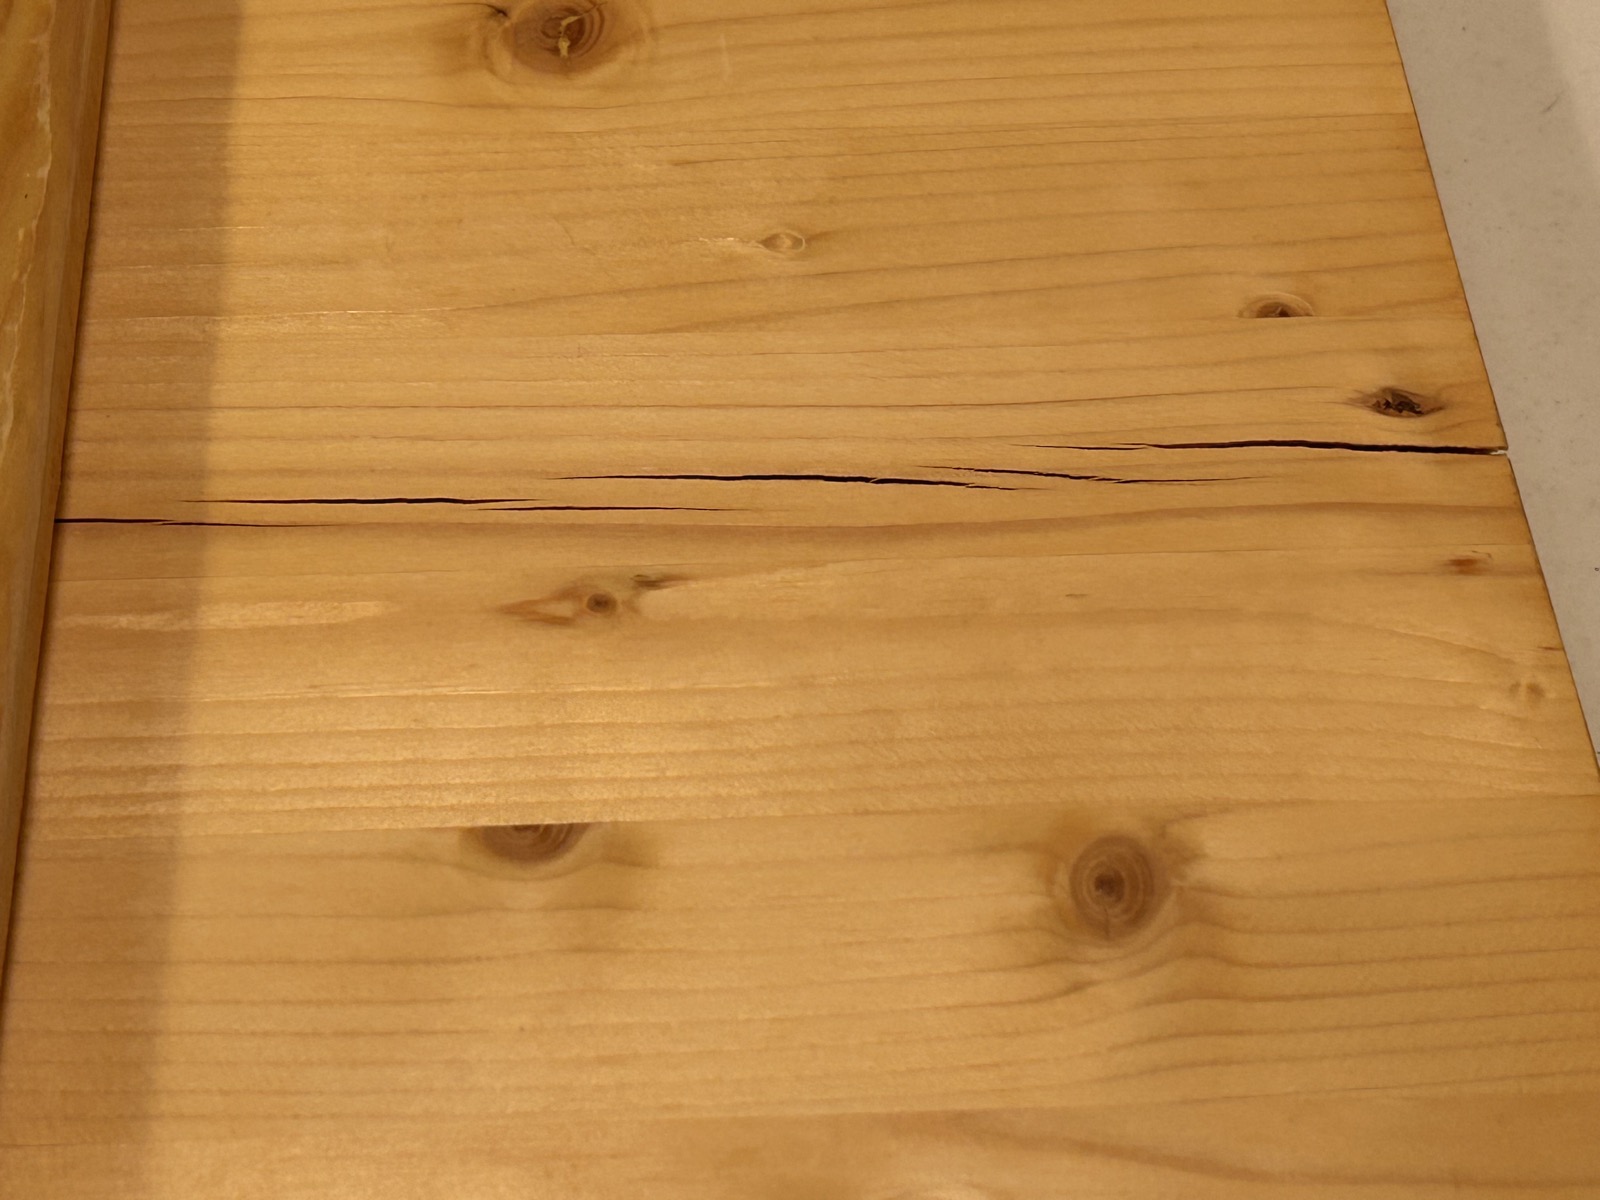
Crack developing under the monitor, right down the middle.
New design: addressing the problems.
I decided it was time to redo the workspace with new stands. Ten years was a good run, but I
wanted something that would address all of these problems:
- uneven desk surface
- flexing and cracking soft wood
- sloping surface too low at the back
We had the inside of our bedroom closet completely refitted with new shelving a couple of years
ago. The guy who did the work was a wizard. Totally custom job, perfectly fitted to the inside
dimensions of the closet, exactly to the specification that we wanted. Beautiful craftsmanship.
Naturally, he had some sheets of shelf board left over which he offered to dispose of for us.
I said I’d keep them, and I’ve had them stowed in the furnace room since then. I saw them
leaning up against the wall and it got me thinking. I had two beautiful pieces, 15″ deep and
both about 40″ wide. This shelf board is probably MDF (medium density fiberboard), it’s basically
made of some kind of wood pulp mixed with glue or resin and then heated and compressed to
make smooth sheets that are a bit hefty but very rigid. They’re factory finished with a white
melamine, rounded at the front.
The table tops are white so a white shelf board felt like a nice match. The table is 6 feet,
3 feet on either side of the fold in the middle. This was fine, because I could take my 40″
sheets and remove 4″ off and have two sheets that span the whole table. All I’d need to add
are some feet, which we’ll talk about below.
Cutting the shelf board to size
I’ve got a circular saw (not a table saw) but I’ve only used it a few times. And, unlike the
carpenter who built my closet, I am not a wood wizard. But I watched some YouTube videos to
get some tips and ideas. I only had these two sheets and really didn’t want to mess them up.
What I learned, I now passs on to you, because the result was fantastic.
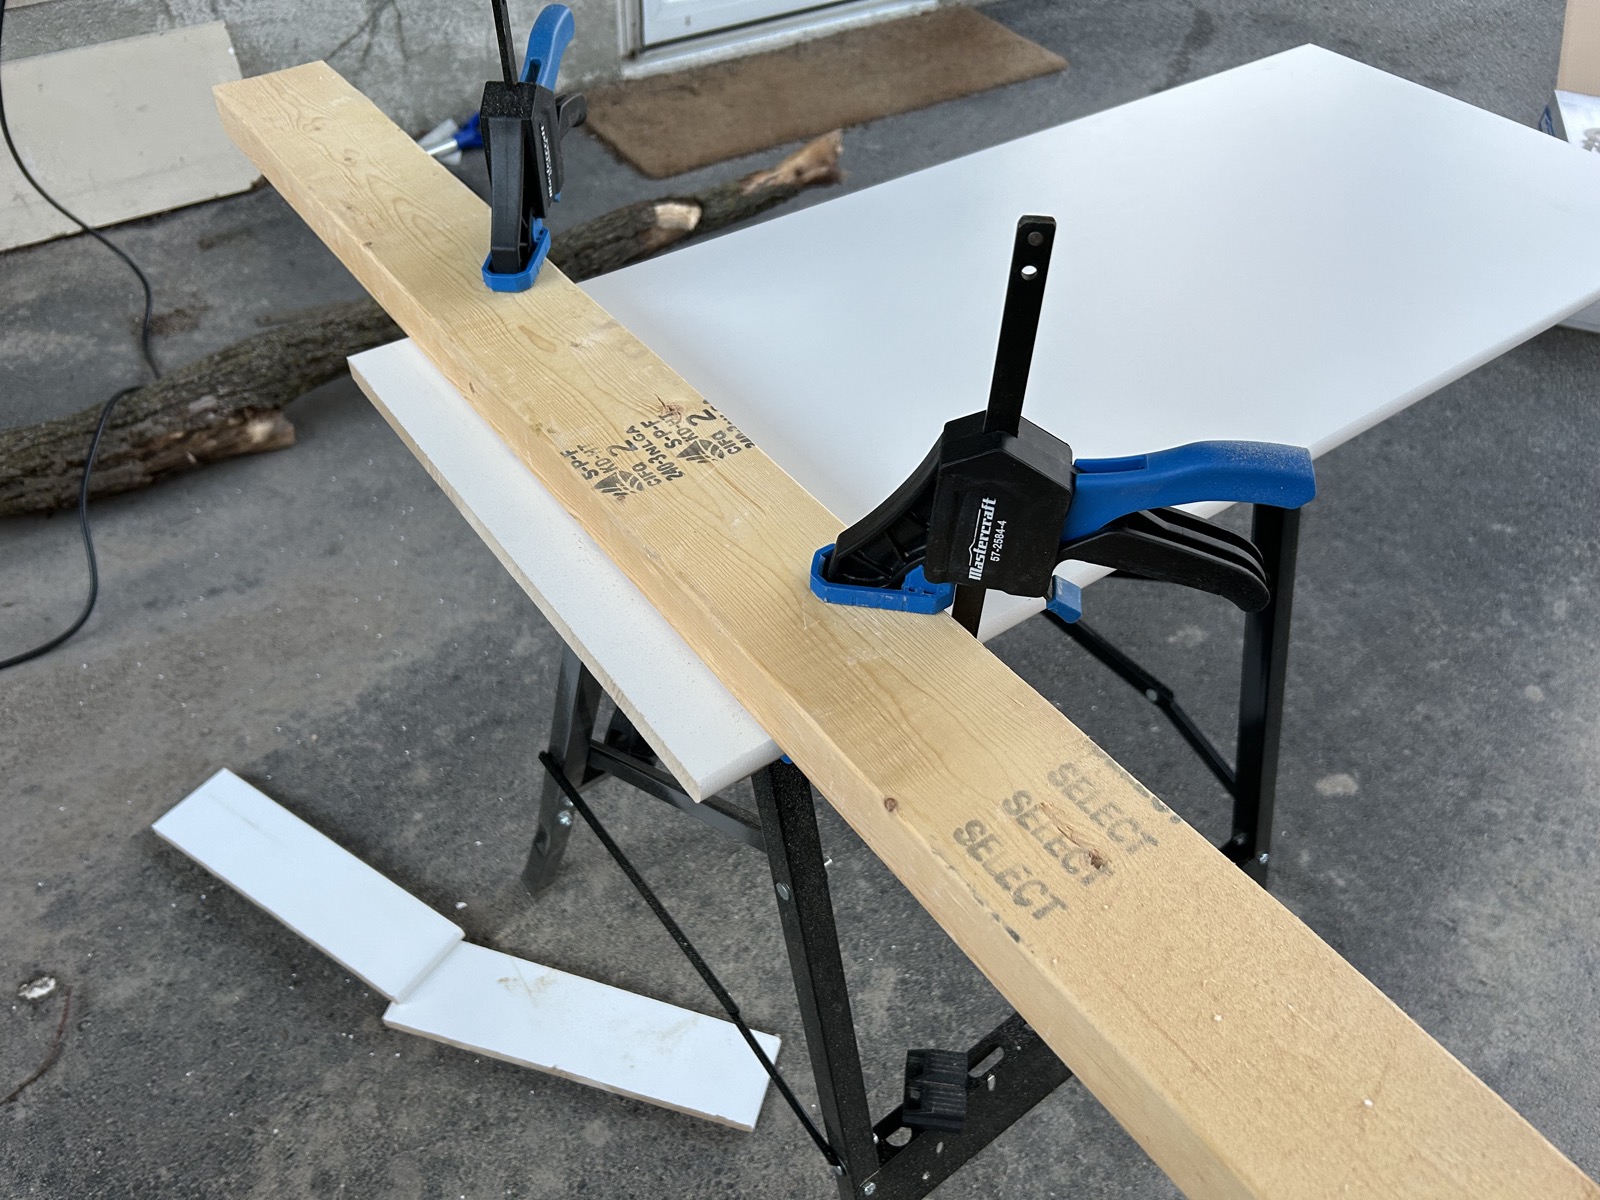
Basically, I started by measuring out 36″ and drew a pencil line where I wanted the cut to be.
The circular saw blade passes through an opening in a metal plate. The metal plate slides along
the surface of the wood you’re cutting. You can adjust the angle of that plate for fancy angled
cuts, but 90 degrees is good for me. So here’s what you do. Measure the distance between the
edge of the metal plate and the saw blade. On mine it’s exactly 1.5 inches. When you clamp
the board down to the sawhorse or work table, you clamp down a 2×4 as a guide set in exactly
1.5″ from the cut line. You can adjust and measure this as much as you want until you’re
satisfied.
The next tip is this, get that saw blade rotating up to full speed before it makes contact with
the shelf board. Push the metal plate up against the 2×4 guide, and then just steadily slide it
along the guide all the way to the end. That guide is like magic. The cut was so perfect, it
looks like it came from a factory. I could not have been happier.
Cutting the shelf board to 36 inches.
Legs for the shelf board
Somehow we’ve gotta get those beautiful new shelves up off the table. But as we remember, the
table top is frustratingly uneven. I didn’t want to end up with fixed leg lengths and a wobbly
uneven shelf top that I would have to shove business cards under to get them straight.
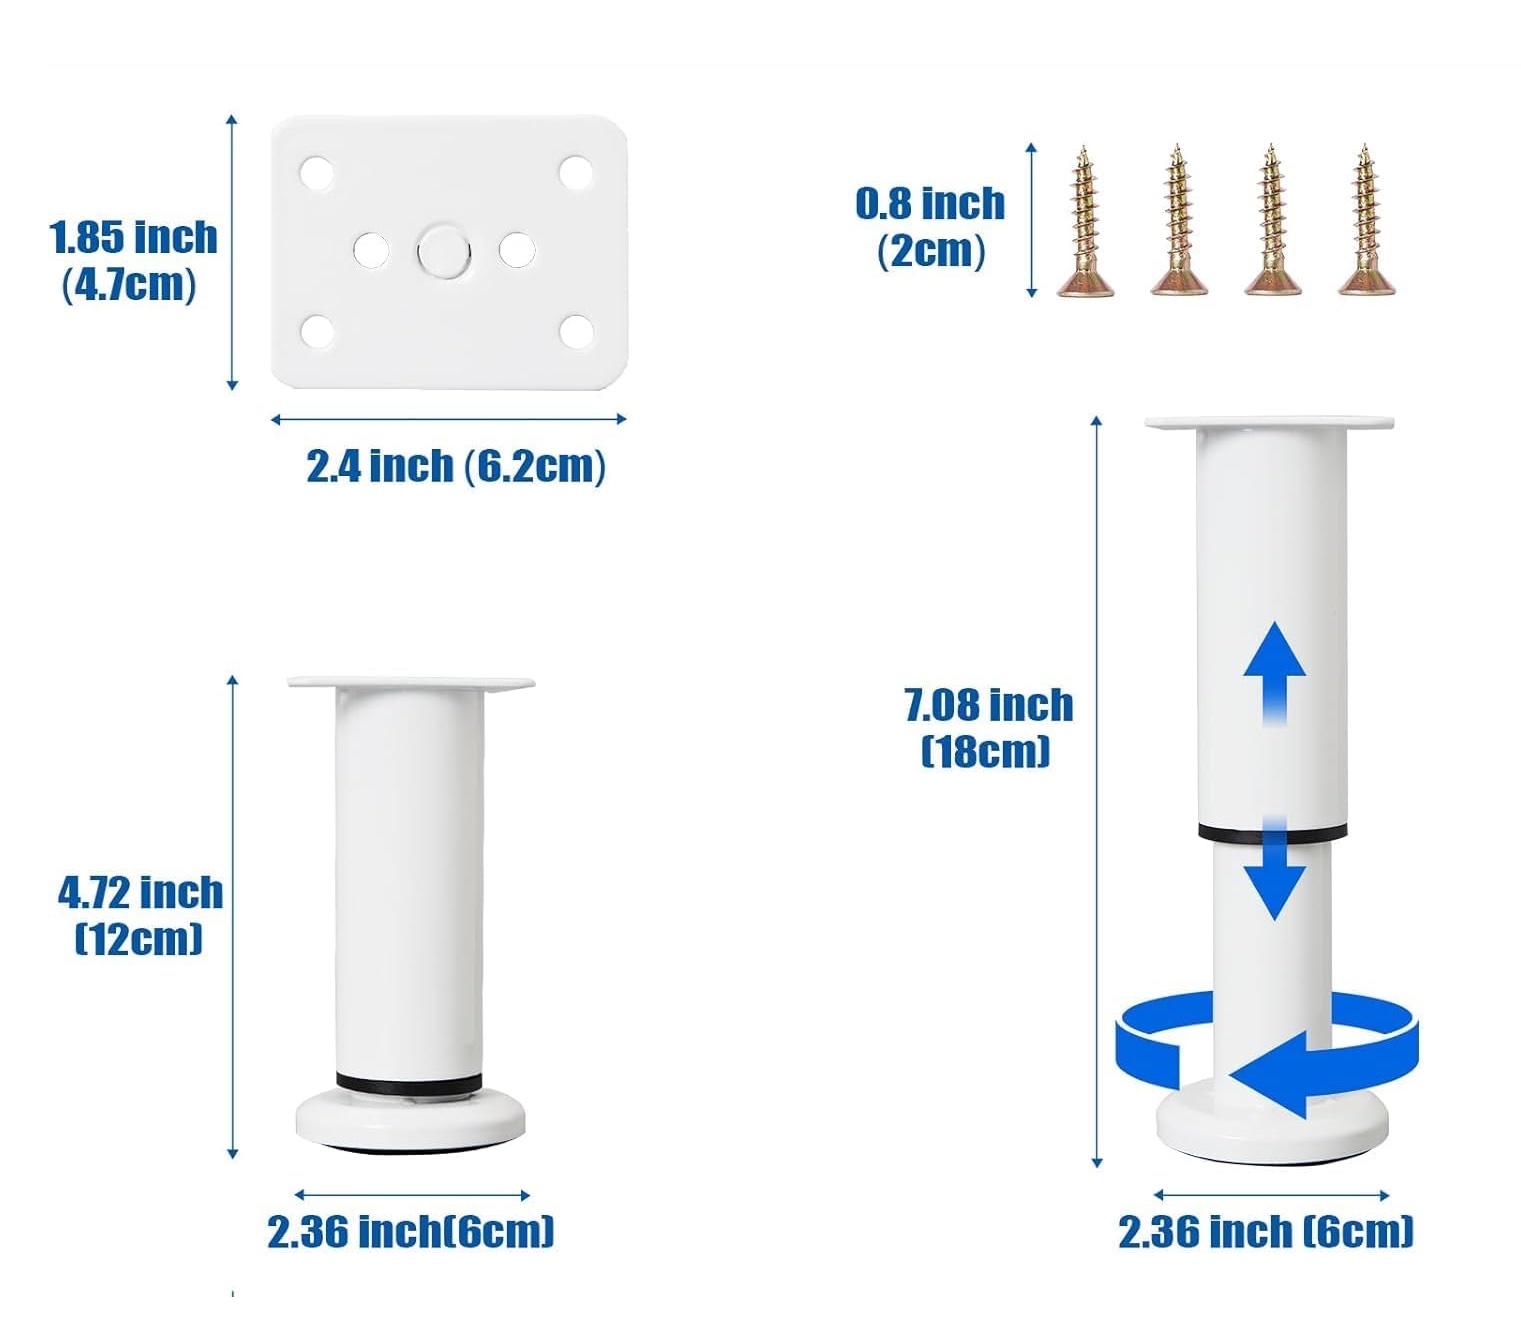
I browsed around Amazon and I found a great solution. Round metal furniture legs that each
have an adjustable height. They came in black or white, I chose white, and they came in a
variety of sizes. The ones I got are 12cm (4.72″) at their shortest and can be extended up to
18cm (7.08″). I chose these ones based on the heights of several Commodore cartridges and
expanders tested in various configurations. It’s cool that at some point down the road if
I need to elevate the shelf a bit to fit some crazy cartridge, I can do that. Each shelf half
can be at different heights too. But the best part about these things is that each foot can
be adjusted just a little bit to make the top surface even and stable. Brilliant.
A four pack of adjustable legs. (Find them on Amazon. This is not a referral link.)
The other nice thing is that you can decide for yourself exactly where you want the legs to
go.
Here’s the thing about stacks of Commodore disk drives. They’re not all the same size. I’ve
got two stacks, bottom to top in order of the size of the drives. 1541, Apple SCSI CD-ROM,
CMD HD, FD-4000. And in the other stack, 1541, CMD HD, 1581. It doesn’t make much sense to
stack them in any other order than the biggest one on the bottom. But as everyone loves to
point out (including me) you really shouldn’t stack things
on top of the 1541’s top ventilation grill. Those suckers heat up and you’ll shorten their
life if the heat is trapped inside.
I had a cool idea, position the legs so that the 1541 could sit on the table beneath the
shelf, with some good ventilation above it, and then the rest of the drives can stack above
it but on the shelf.
Glory shots of the final result
I’m really pleased with the final result. Here are some shots that show it off.
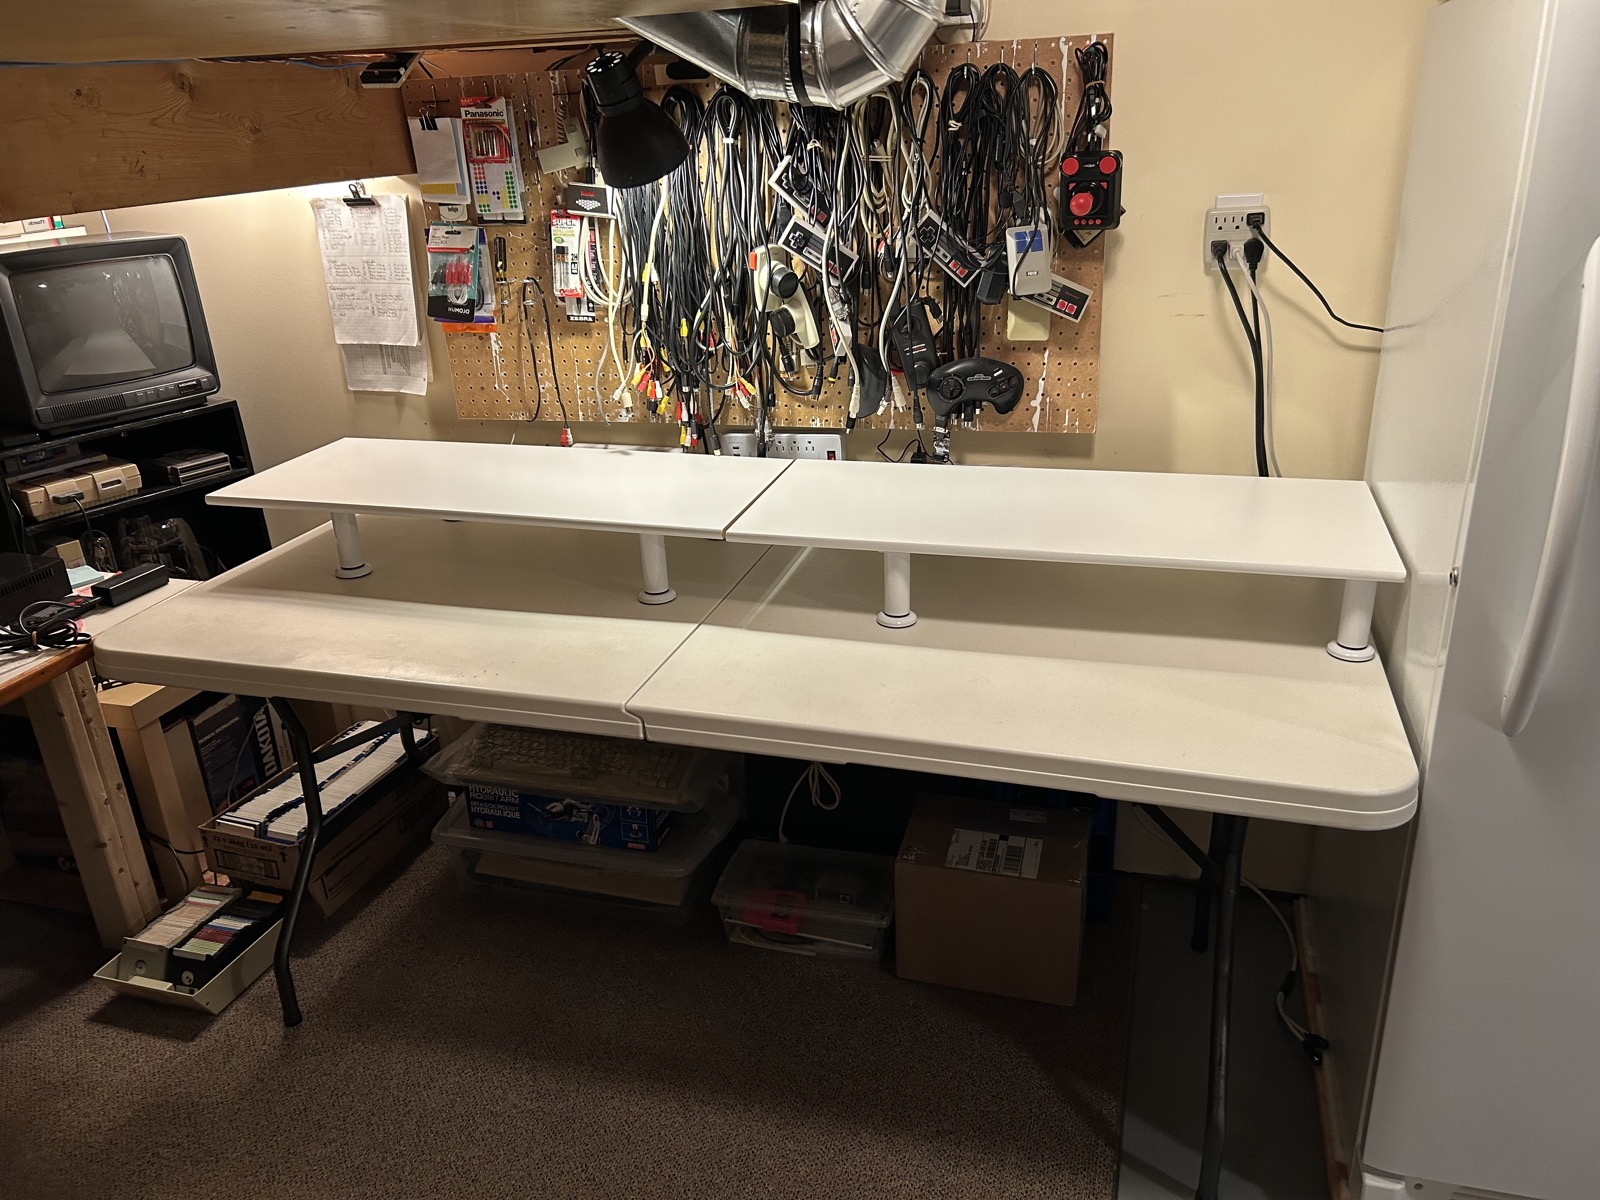
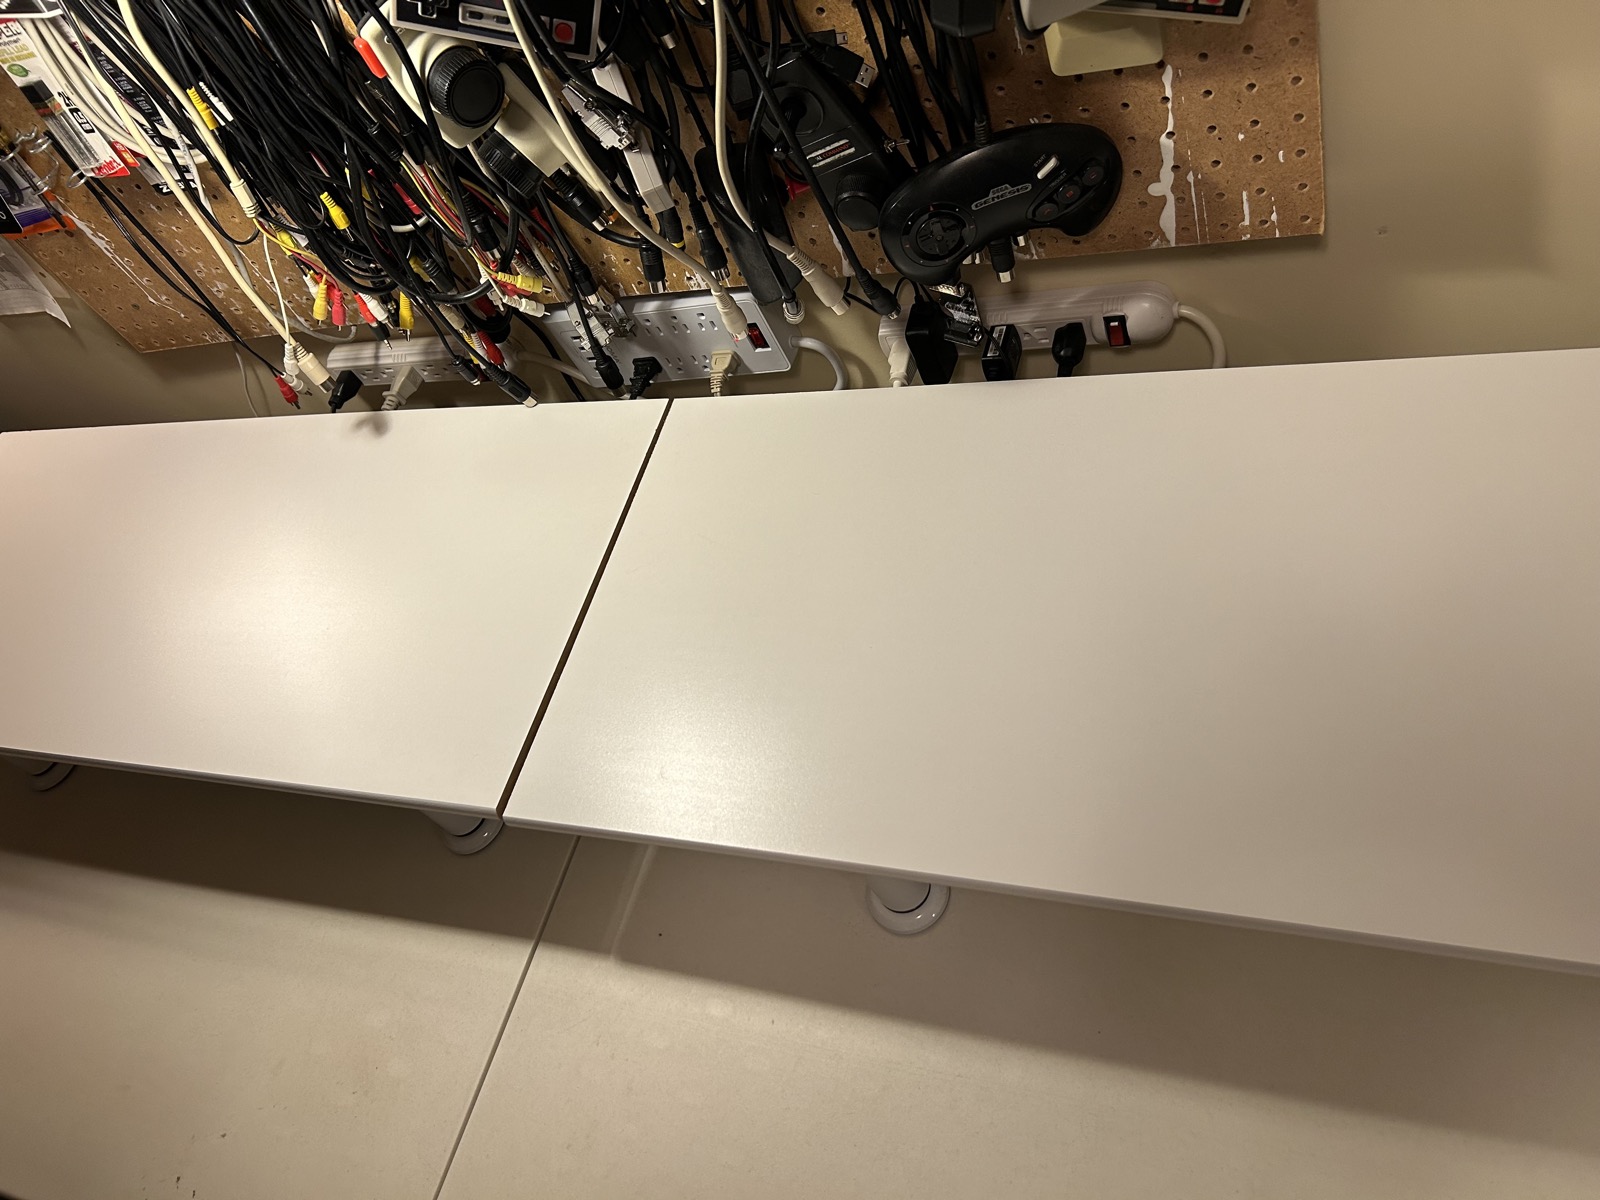
Just the shelves, nothing on them yet!
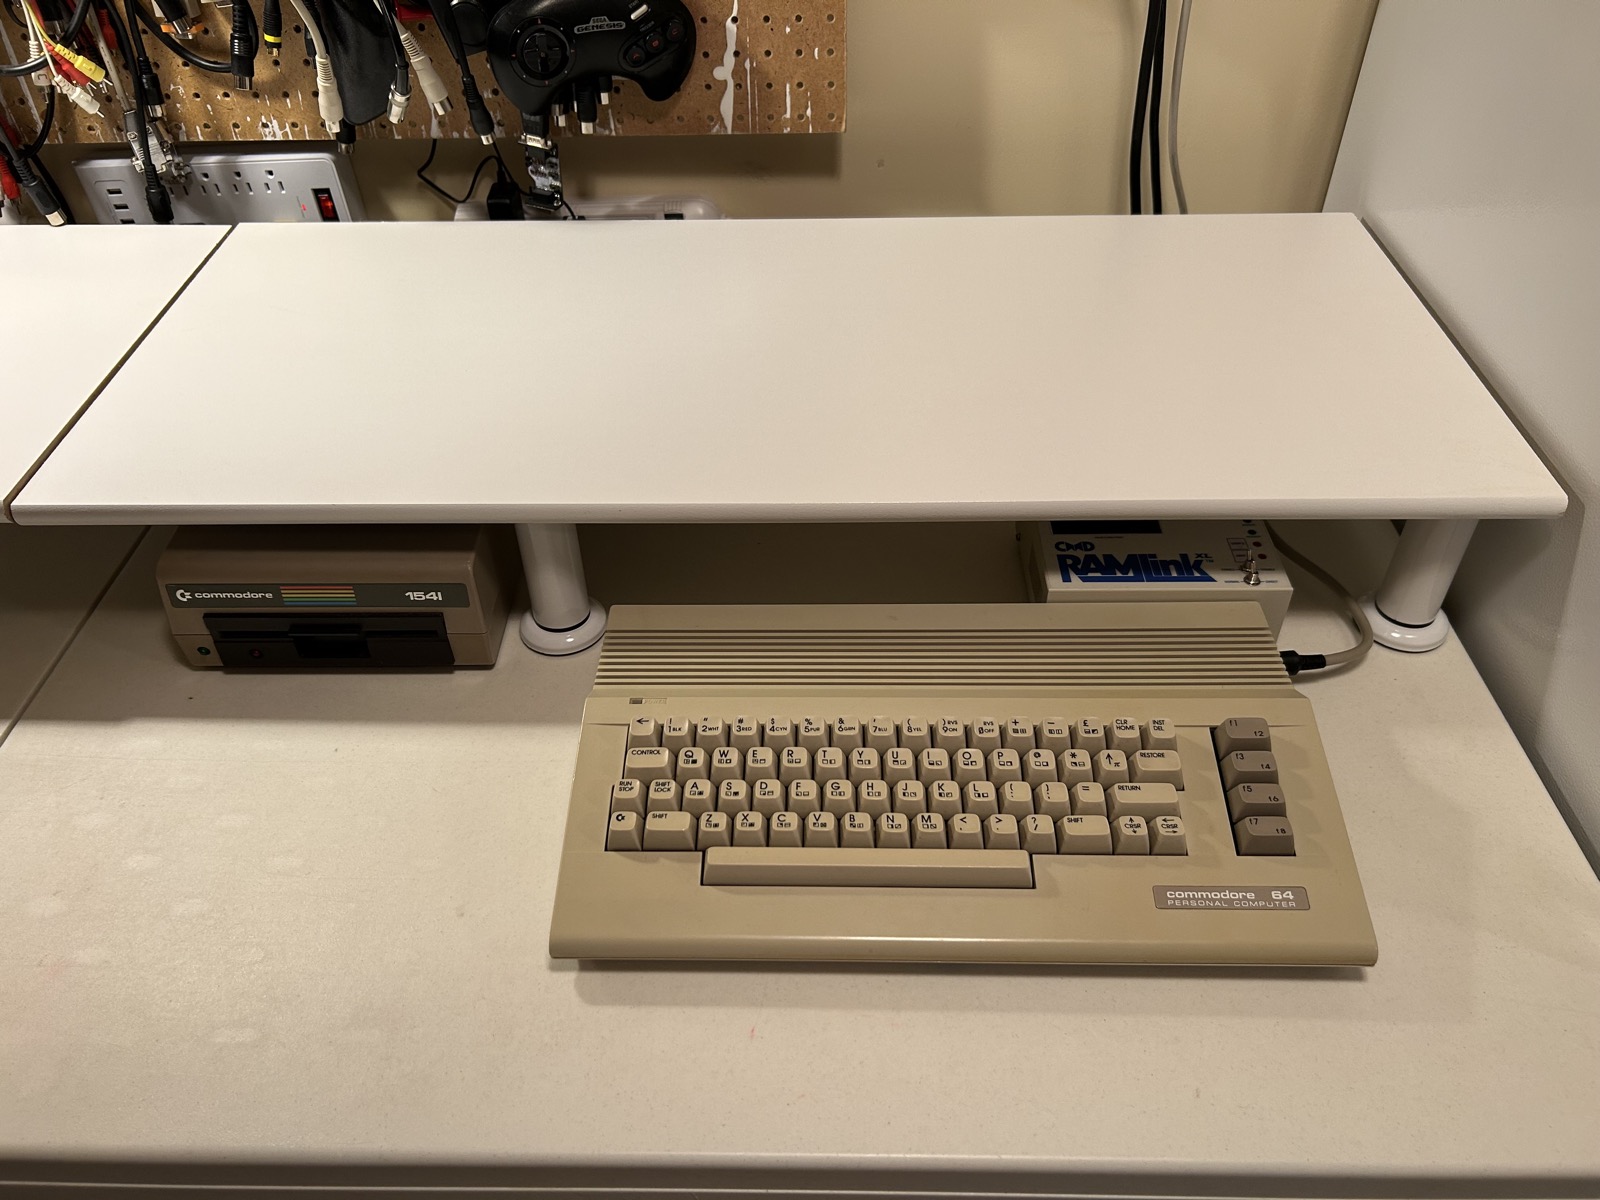
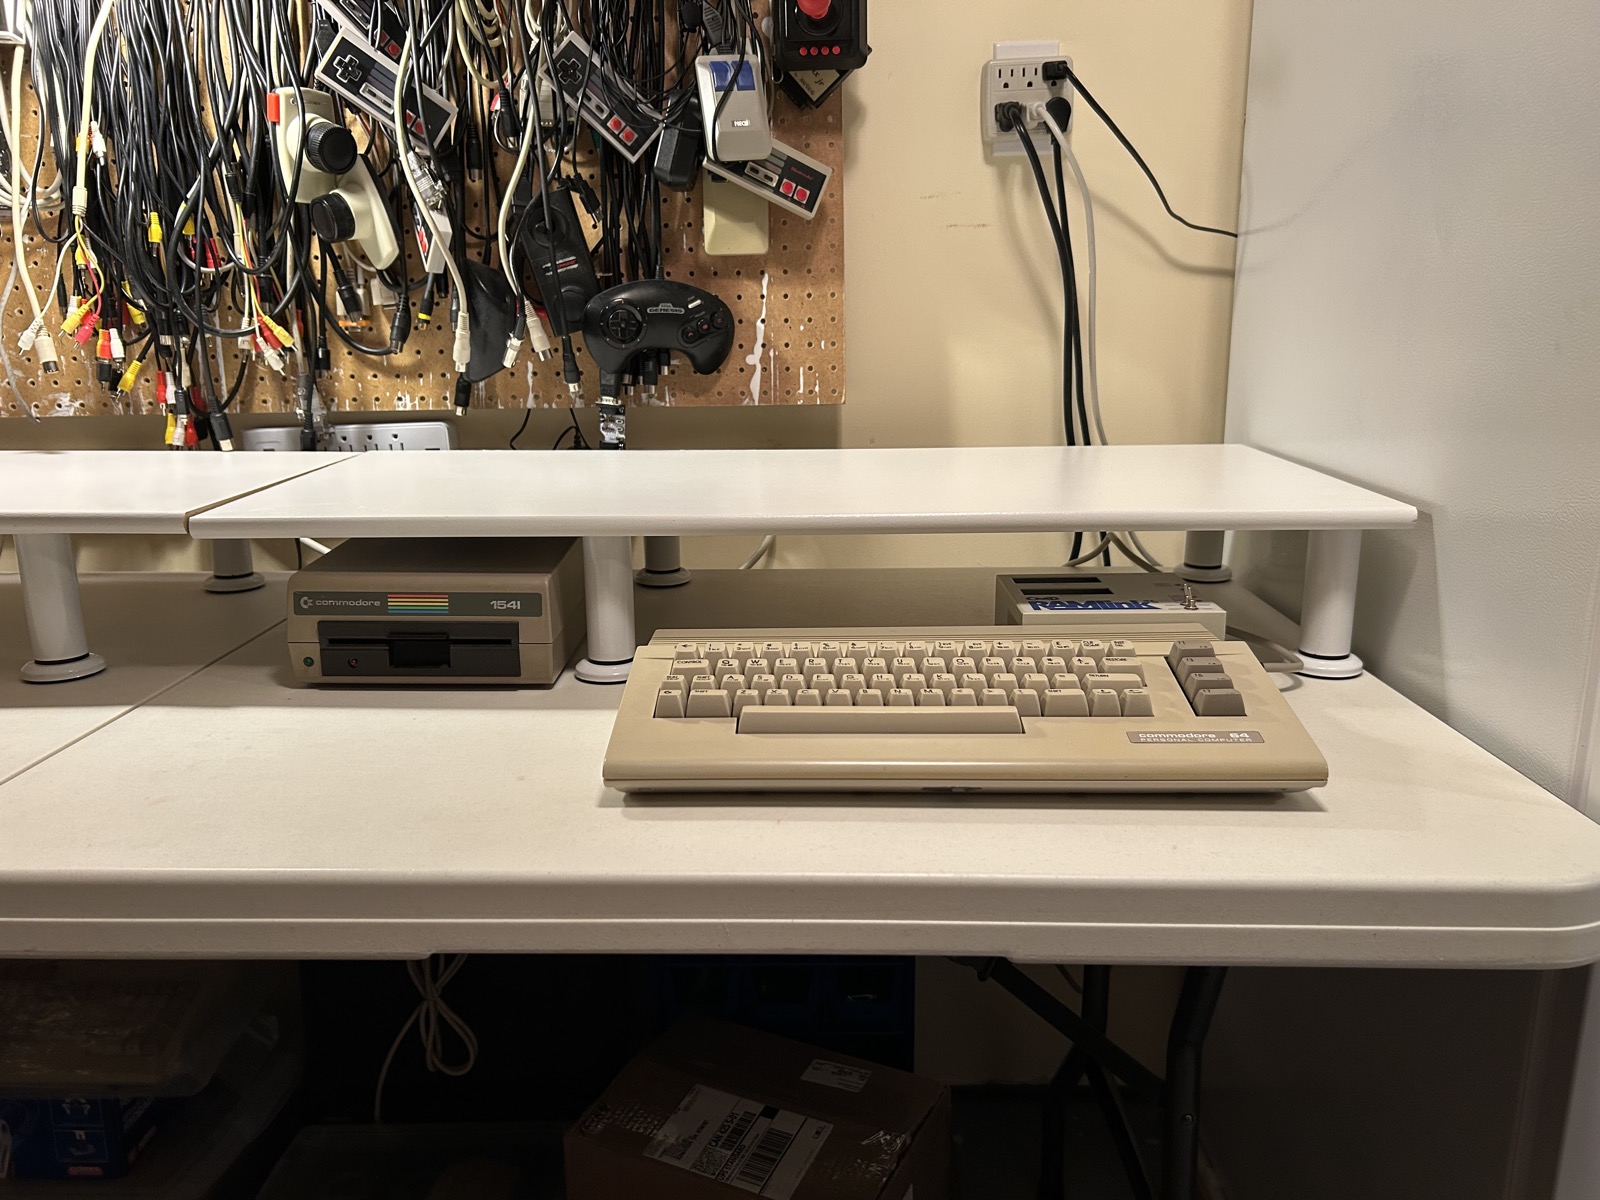
C64c, RAMLink and 1541
I think it’s pretty cool. Room for the RAMLink even with a cartrige coming out the top of it.
The 1541s get nice slots under the shelf with some ventilation breathing room above.
And here’s the final look, with all the monitors, computers, drive stacks and other stuff
spread out on them. I think it’s a nice step up from my older stands. And I think the white
desk with white legs and white shelf board looks sharp.
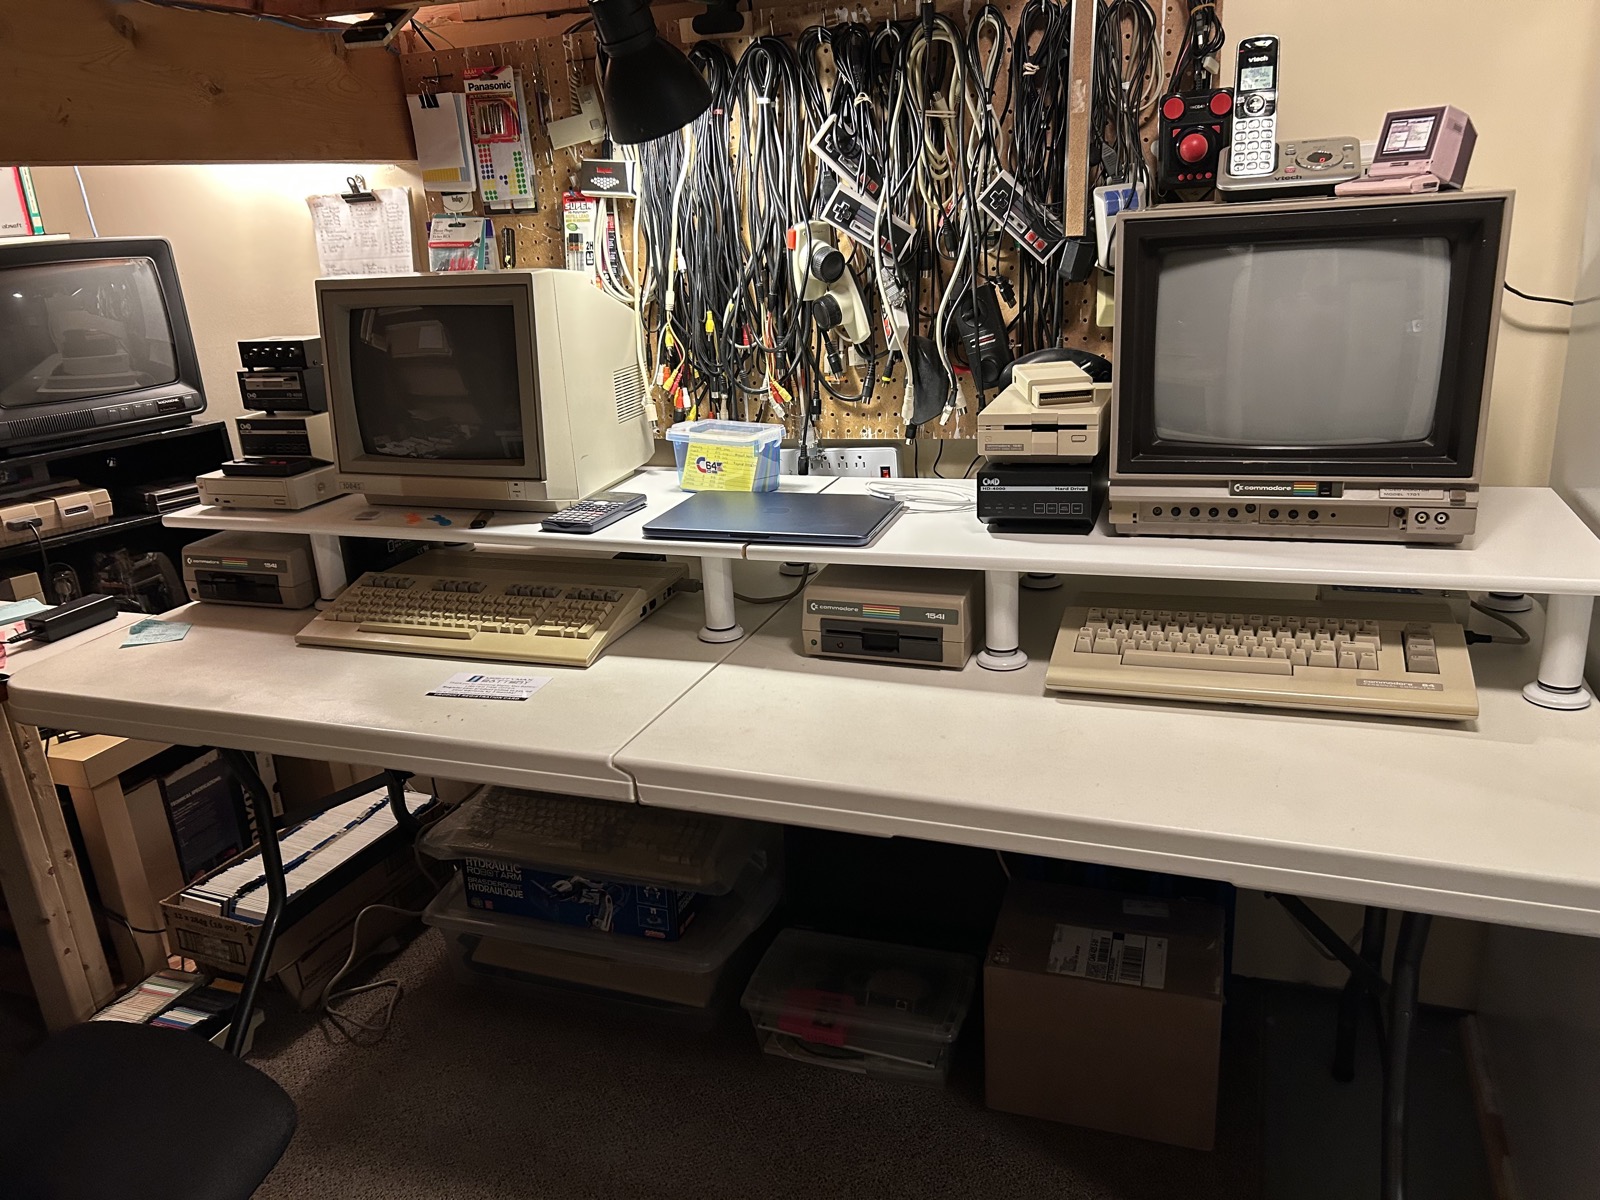
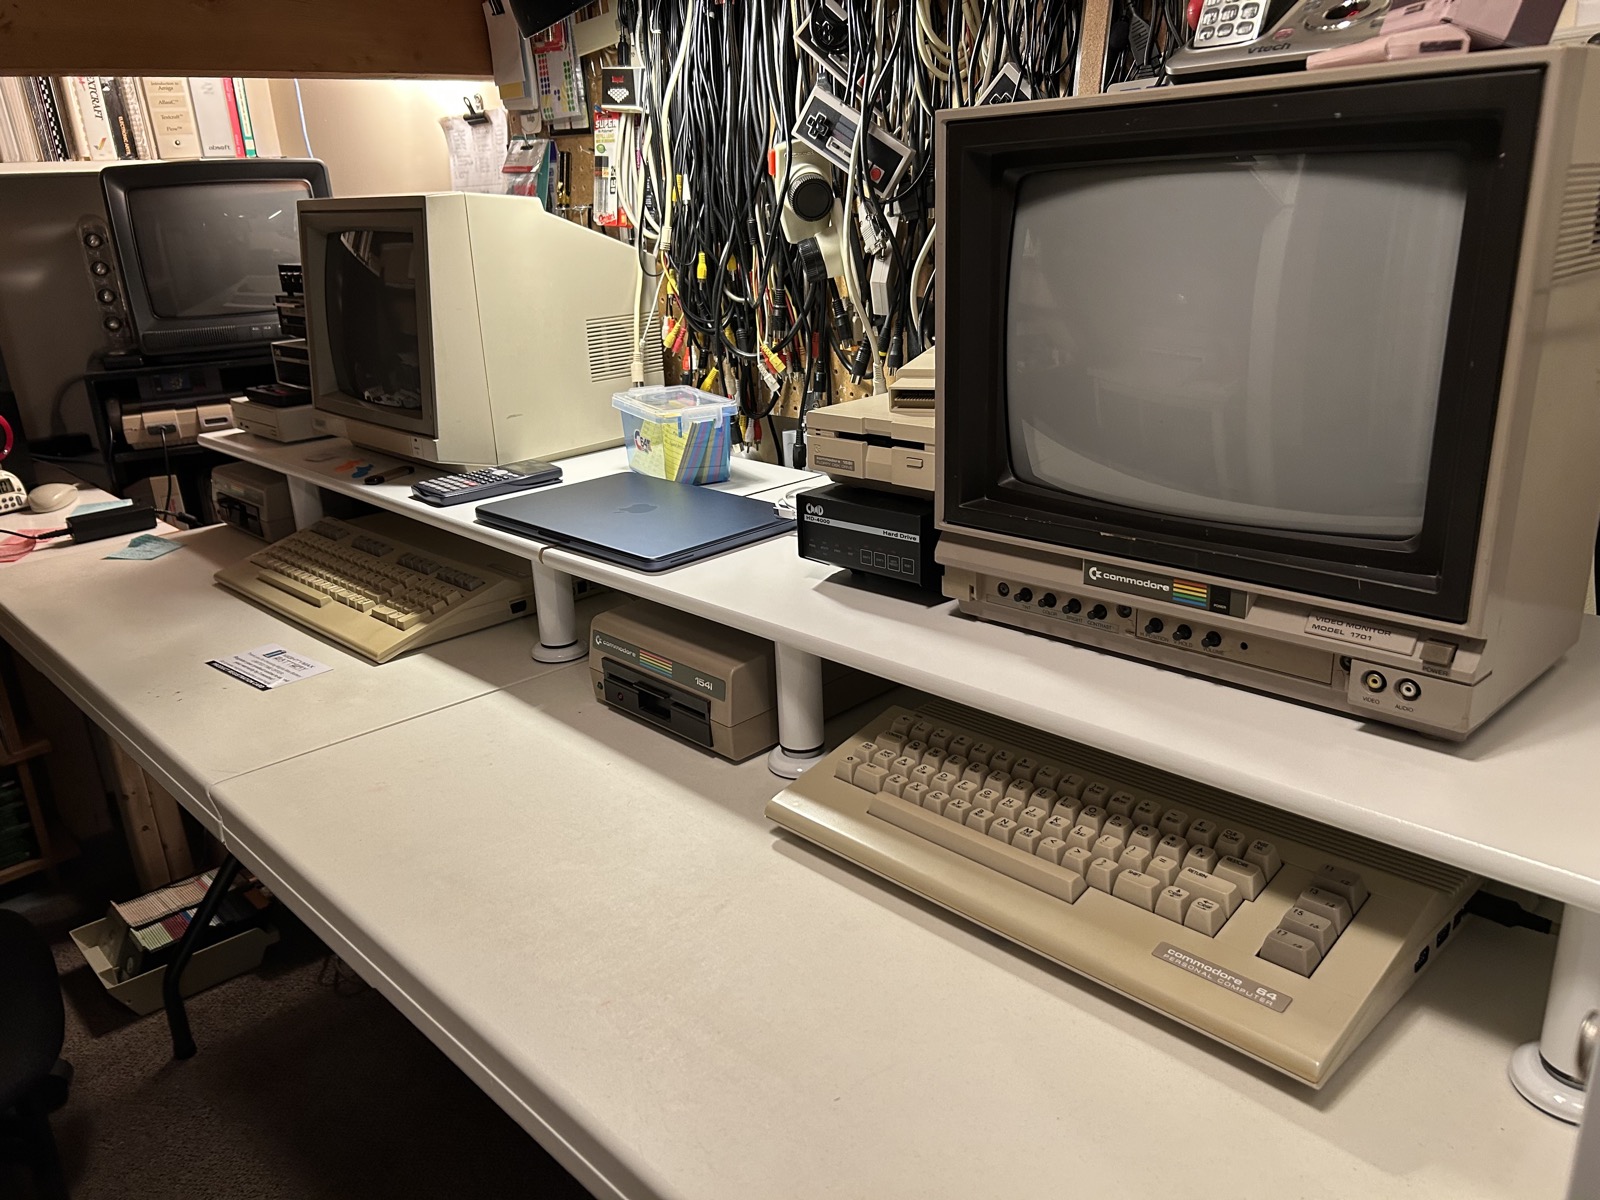
New workspace monitor shelf
Remember to dig in, use and enjoy your Commodore 64.
Original article by www.c64os.com